Homemade sourdough bread is easier to learn than it looks, and this guide focuses on repeatable steps you can do in a home kitchen with common tools. You’ll learn how to care for a starter, mix and develop dough, manage bulk fermentation, shape with tension, proof intelligently, bake with steam, and troubleshoot common issues so your loaf improves week after week.
What makes sourdough different
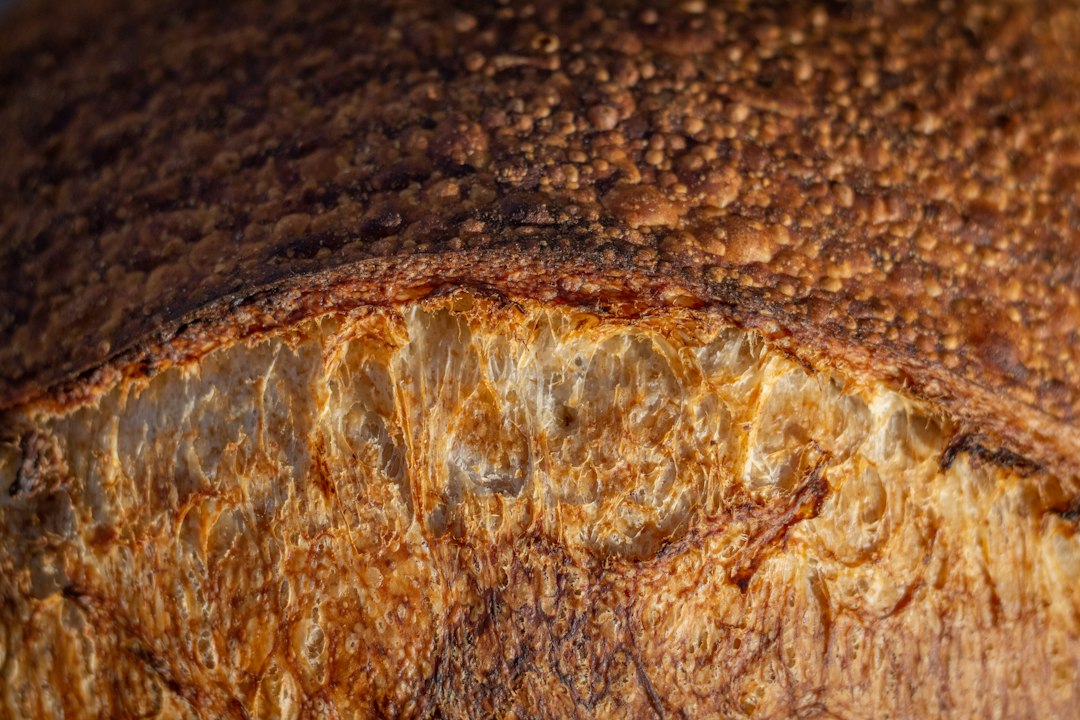
Sourdough relies on a living culture—your starter—rather than commercial yeast. A balanced starter contains wild yeast that lifts the dough and friendly bacteria that produce organic acids for flavor. This combination yields the familiar sourdough traits: gentle tang, open crumb, and sturdy crust. It also means your bread responds to time and temperature more than to additives or aggressive mixing.
Three ideas guide the process:
- Time is an ingredient: Fermentation develops flavor and structure. Resisting the urge to rush keeps dough lively and crumb tender.
- Temperature sets the pace: Warmer dough ferments faster; cooler dough slows down. Small temperature changes lead to big timing differences.
- Tension shapes rise: A taut outer surface helps the loaf expand upward, building height and an attractive ear at the score.
When those ideas become second nature, each step—autolyse, folds, proof choices, and baking—feels like a sensible response to what you see and feel in the dough. You’re not guessing; you’re steering.
Essential tools and practical substitutes
You can bake excellent bread without a specialty kit. Prioritize a few reliable items and improvise the rest. Here’s a home-friendly toolkit:
- Kitchen scale: The most important tool. Weighing ingredients yields consistent hydration and helps you apply baker’s math.
- Mixing bowl or tub: Stainless, glass, plastic—all fine. A rectangular dough tub makes it easier to watch rise and bubbles.
- Bench scraper: Indispensable for shaping, cleanup, and handling sticky dough.
- Dutch oven or stone/steel: A heavy lidded pot traps steam. A preheated stone or steel plus a steam tray works well if you don’t own a Dutch oven.
- Banneton or lined bowl: A wicker basket or a colander lined with a floured kitchen towel supports shape during proofing.
- Lame or sharp blade: A razor blade, serrated knife, or clean scissors for scoring.
- Thermometer (optional): A probe for internal loaf temperature and a small thermometer to check dough temp during mixing.
- Clear jar with lid: Starter maintenance is easier when you can watch rise and bubbles along the sides.
Smart substitutes work. No banneton? Use a bowl lined with a floured towel. No Dutch oven? Preheat a heavy baking steel and add steam with a shallow tray and a handful of ice cubes right after loading. Focus on method over gadgets and your bread will improve steadily.
Starter care and levain planning
Your starter is the heartbeat of your baking. A steady routine—feed, observe, bake—keeps it active and predictable. For a new culture, mix equal parts flour and water (for instance, 50 g flour + 50 g water), cover loosely, and keep it somewhere comfortable. Each day, discard half and feed again until the starter rises reliably, smells pleasantly sweet-sour, and shows bubbles throughout.
Once active, pick a schedule that fits your life:
- Frequent baking: Keep the starter at room temperature and feed 1:1:1 (starter:flour:water) once or twice daily depending on warmth.
- Weekly baking: Store the jar in the fridge, then pull it out and feed the day before mixing. Two refreshments often bring it back to an energetic rise.
- Levain build: For bread day, build a levain in a separate container using your recipe’s ratios so you know it will be at peak when you mix the dough.
Reading the signs:
- Rise and dome: A lively starter doubles and forms a gentle dome that slowly flattens as activity peaks.
- Aroma: Pleasant tang, fruity notes, or mild yogurt-like smells suggest balance. Strongly sharp aromas can mean the culture is hungry; feed and allow time.
- Texture: Bubbles clinging to the jar walls and an airy feel indicate robust fermentation.
If the starter seems sleepy, feed warmer and give it longer between refreshments. If it races and collapses quickly, a cooler spot and more frequent smaller feeds can steady the arc. Make small adjustments and take notes—consistency comes from pattern recognition.
Ingredients that support reliable dough
Simple ingredients build dependable bread. Choose each component with the dough’s behavior in mind:
- Flour: Bread flour adds strength. All-purpose flour works with a bit more folding for structure. Whole wheat and rye boost flavor and fermentation. A common blend is 80–90% bread or all-purpose for structure and 10–20% whole grain for taste.
- Water: Cool to lukewarm water helps control fermentation speed during mixing. If tap water smells strongly of chlorine, filtered water may lead to more predictable results.
- Salt: Fine sea salt dissolves easily. A typical range is 2% of flour weight—for 500 g flour, use about 10 g salt.
Small flour differences matter. One brand’s bread flour may feel stronger than another. If a bag behaves weak, add an extra coil fold during bulk, proof a touch cooler, or slightly reduce hydration until the dough feels cooperative again.
Baker’s math and scheduling your day
Baker’s math expresses all ingredients as percentages of the flour, which is set to 100%. This turns guesswork into control. A typical formula for one medium loaf looks like this:
- Flour 100% (e.g., 500 g)
- Water 68–72% (e.g., 340–360 g) — adjust based on flour strength and comfort
- Salt 2% (e.g., 10 g)
- Levain 20% (e.g., 100 g of 100% hydration levain)
Hydration choices set dough feel and crumb style. Lower hydration (65–68%) yields an easier dough and a tighter, still delicious crumb. Higher hydration (72–78%) can build a more open crumb but asks for gentler handling and better folding discipline.
Use a simple timeline and adapt it to your kitchen:
- Autolyse: Mix flour and water, rest 30–60 minutes.
- Mix: Add levain and salt, combine with a gentle method.
- Bulk fermentation: 3–5 hours at moderate room temperature with periodic folds.
- Shape and proof: Pre-shape, rest, final shape. Cold proof 12–16 hours for flavor and convenience, or room proof 1–3 hours when time is tight.
- Bake: Preheat thoroughly, load with steam, finish with a dry phase for crust.
Set a target final dough temperature around 24–26°C (75–79°F). If your kitchen runs warm, use cooler water during mixing; if cool, use slightly warmer water. Record times, dough temperatures, and observations after each bake to refine your schedule season by season.
Mixing strategies and gluten development
Good dough does not require aggressive kneading. Mixing hydrates flour, distributes salt, and introduces levain. Autolyse—resting the flour and water mix—starts gluten development without effort and makes later mixing smoother. After autolyse, add levain and salt and combine with one of these gentle methods:
- Rubaud method: Lift and drop the dough in a rhythmic motion for a few minutes. This supports elasticity without overworking.
- Slap-and-fold: Helpful for higher hydrations. A brief session builds strength quickly and tidies the mass.
- Pinch-and-fold: Pinch the dough and fold edges toward the center, rotating as you go. It’s clean, effective, and well-suited to moderate hydrations.
Stop when the dough looks cohesive and elastic, not tight. The goal is enough strength to hold together while fermentation and periodic folds continue building structure. If the mass feels ragged, rest 10 minutes and do a short second round. If it feels stiff, give it a longer rest and rely more on folds during bulk to finish the job.
Bulk fermentation: temperature, timing, and folds
Bulk fermentation is where dough becomes airy and flavorful. Transfer the mixed dough to a lightly oiled bowl or a dough tub, cover, and let it rest at a comfortable room temperature. Perform gentle folds across a few hours to build strength without tearing:
- Stretch-and-fold: Grab an edge, stretch up, fold over. Rotate the bowl 3–4 times per session to complete the set.
- Coil fold: Lift from the center and let the dough coil under itself. Ideal for high hydration doughs where gentleness matters.
- Letter fold: Fold the dough in thirds like a letter. Useful when flour feels weak or dough seems slack.
Watch the dough and rely on signs more than the clock:
- Volume: A rise around 20–50% during bulk depending on your formula, temperature, and levain strength.
- Surface: Smoother with small bubbles under the skin and a slight wobble if you jiggle the tub.
- Feel: Airy and elastic, resistant yet relaxed when you lift an edge.
Warmer kitchens may finish bulk in about three hours; cooler rooms may need closer to five. If you’re uncertain, add a gentle coil fold and wait 30 minutes, then re-check. Patience is a powerful ingredient—letting fermentation and folds work together often solves the texture questions you see and feel.
Shaping, proofing, and scoring
After bulk, release the dough onto a lightly floured surface. Perform a pre-shape into a loose round or oblong and rest 15–30 minutes. This relaxes gluten so final shaping can build a taut surface without tearing.
Final shaping methods:
- Boule (round): Use a bench scraper and your hands to drag the dough toward you, rotating to create surface tension. Aim for a smooth, tight skin.
- Batard (oval): Gently flatten into a rectangle, fold sides inward, then roll into a log, sealing seams with light pressure.
- Pan loaf: For a sandwich-style bread, shape into a log and place in a greased pan; proof and bake accordingly.
Proofing choices:
- Cold proof: Refrigerate 12–16 hours. The slower pace deepens flavor, firms the surface for easier scoring, and delivers convenient bake timing.
- Room proof: 1–3 hours depending on your environment. Useful when you need to bake the same day. Monitor closely to avoid over-proofing.
Readiness cues:
- Poke test: A gentle press springs back slowly and leaves a faint impression.
- Look: Dough appears slightly fuller with tiny bubbles under the surface.
- Feel: A light, airy resistance rather than dense pushback.
Scoring guides expansion and adds character. Use a sharp blade for a decisive main score at a slight angle so the cut opens in the oven. A typical primary score is around 1–1.5 cm deep; keep decorative cuts shallow so they don’t deflate the loaf. Score quickly, load immediately, and get steam into the oven right away.
Baking methods and crust management
Preheat your oven thoroughly—30–45 minutes is a helpful benchmark. A Dutch oven gives reliable steam and oven spring. A stone or steel produces a crisp bottom and broad flexibility with loaf shapes as long as steam is managed.
Typical bake plan for a 750–900 g loaf:
- Preheat: 250°C (480–500°F) with your vessel or baking surface inside.
- Load and steam: Score the proofed dough, load onto the hot surface, cover if using a Dutch oven, or add steam with ice cubes in a tray.
- Steam phase: Bake covered or with active steam for 20–25 minutes.
- Dry phase: Lower to 230–240°C (445–465°F), uncover or remove steam tray, and bake 20–25 minutes more until crust color and internal temperature near 96–98°C (205–208°F).
Crust adjustments:
- Pale crust: Extend the dry phase 5–10 minutes to encourage deeper color.
- Over-browned bottom: Move the rack up a level next time or insulate under the stone with a spare sheet pan.
- Soft crust post-bake: Ensure a longer dry phase and cool fully on a rack before storing to maintain crunch.
Loaves baked directly from a cold proof typically score easily and produce clean ears. Room proofs ask for sharper readiness checks, but they can deliver excellent results on tight schedules. Pick the path that fits your timing and flavor goals, then refine details bake by bake.
Homemade sourdough bread troubleshooting
Use this practical checklist to diagnose common issues and apply small, targeted fixes. Change only one variable at a time and note the outcome so cause-and-effect stays visible.
- Dense loaf: Extend bulk or warm the dough during bulk by a degree or two. Add a gentle fold. Confirm levain readiness by watching rise and dome before mixing.
- Flat, spread-out loaf: Build more surface tension during shaping and proof slightly cooler. Consider longer cold proofing to firm the skin before baking.
- Poor oven spring: Preheat thoroughly, generate steam quickly, and avoid over-proofing. Score with a clean, confident cut and load right away.
- Gummy crumb: Bake longer in the dry phase and cool 1–2 hours before slicing. Review hydration relative to flour strength and add a fold if the dough felt too loose.
- Bitter or harsh flavor: Shorten bulk or mix with cooler water. Refresh starter and levain so they arrive at peak with milder notes.
- Weak ear: Use a shallow, angled main score, keep steam high in the first phase, and load immediately after scoring.
- Irregular holes (large near top, tight near bottom): This often comes from a dough that was slightly underdeveloped or shaped without even tension. Add a coil fold mid-bulk and shape with deliberate, even pressure.
- Blowouts (unplanned splits): Usually from a tight skin or insufficient scoring. Soften the skin slightly during shaping, and score deeper or adjust score placement.
When a bake surprises you, it’s usually the timing or structure. A notebook is your ally. Record dough temperature at mix, the number and type of folds, bulk duration, proof choice and time, bake temperatures, and a short flavor/crumb note after slicing. Two to three bakes later, a clear pattern emerges.
Variations, special loaves, and add-ins
Once your base loaf feels consistent, experiment with flavor. Add-ins change dough behavior, so start modestly (10–20% of flour weight) and adjust based on how the dough responds.
- Seeds: Toasted sesame, sunflower, or pumpkin add texture and warmth. Hydrate seeds briefly if adding a large quantity so they don’t pull moisture from the dough.
- Grains: Soaked cracked wheat, bulgur, or oats bring a sweet nuttiness. Drain well to avoid excess water in the mix.
- Herbs and aromatics: Rosemary, thyme, roasted garlic, or caramelized onions work nicely. Fold in during early bulk for even distribution.
- Dried fruit and nuts: Raisins, cranberries, walnuts, or pecans are classics. Pair sweetness with a touch more salt if needed, and perform an extra gentle fold so chunks spread evenly.
- Olives or cheese: Rich add-ins are best with cooler proofing and a slightly tighter shape to protect structure.
Flavor tuning tips:
- Acidity: For more tang, use slightly warmer dough or extend cold proof. For a milder profile, refresh levain and shorten bulk a bit.
- Crust style: For a thinner, crackly crust, bake at a higher initial temperature. For a thicker, rustic crust, allow a longer dry phase at the end.
- Crumb openness: Higher hydration and gentle handling encourage larger holes. Lower hydration and firmer shaping yield a tidy, sandwich-friendly crumb.
And remember, restraint is powerful. A little rosemary goes a long way; a small handful of seeds can transform texture. Aim for balance between dough integrity and flavor extras.
Storage, slicing, weekly routine, and recordkeeping
Let the loaf cool fully on a rack. Slicing too early compresses crumb and traps steam, softening the crust. Once cool, choose slice thickness for the meal:
- Thick slices: Rustic, perfect for soups and stews, and they keep a chewy interior.
- Thin slices: Crisp and ideal for toast and sandwiches, highlighting crust.
Storage plan:
- Short term (1–2 days): Paper or cloth bag at room temperature preserves crust texture best.
- Medium term: Slice and freeze in a bag; reheat directly from frozen in a toaster or warm oven.
- Avoid sealing hot bread: Condensation softens crust quickly; wait until fully cool.
A simple weekly routine keeps bread on your table without stress:
- Day before bake: Feed starter in the morning; build levain in the evening. If it’s warm, use cooler water to keep levain lively but not overshooting by morning.
- Bake day morning: Autolyse flour and water; mix in levain and salt; start bulk. Perform 3–4 folds across 3–4 hours depending on dough temperature.
- Bake day afternoon/evening: Pre-shape, rest, final shape; move to cold proof.
- Next morning: Bake directly from the fridge with steam; cool, slice, and store.
Recordkeeping turns experience into steadier results. Write down flour brand and blend, hydration, levain percentage, dough temperature after mixing, the number and type of folds, bulk duration, proof choice and length, bake temperatures and times, and quick impressions of crumb and flavor. Over a few weeks, patterns give you confidence to adjust one variable at a time.
Comparing key decisions and tuning your approach
Most sourdough debates are trade-offs. Thinking in terms of outcomes helps you decide which path fits your kitchen and taste.
- Higher vs lower hydration: Higher hydration can lead to a more open crumb and thinner crust but demands steadier handling and stronger flour. Lower hydration behaves predictably and slices neatly; flavor remains excellent.
- Cold vs room proof: Cold proof deepens flavor, firms the surface for scoring, and simplifies scheduling. Room proof speeds everything up but asks for sharper judgment about readiness.
- Dutch oven vs stone/steel: Dutch ovens provide reliable steam and oven spring. Stones or steels produce crisp bottoms and support varied loaf shapes if you add steam efficiently.
- Levain percentage: More levain shortens the schedule and nudges flavor toward milder tang; less levain slows things down and may accentuate complexity. Match levain to your timeline and palate.
- Shaping style: Boules rise tall and create symmetrical ears. Batards fit rectangular stones, slice beautifully for toast, and offer a broader crust surface. Pan loaves favor sandwiches and weeknight convenience.
Try small experiments. If stone bakes give you a pale bottom, move the rack up or place a second pan underneath to insulate. If your crumb feels tighter than you like, raise hydration a few points and add one extra coil fold. Change one thing, note the difference, and build the loaf you prefer by iteration.
Beginner-friendly base formula and process recap
Use this balanced, straightforward formula as a reliable baseline, then adjust to taste as your handling improves.
- Flour: 500 g total (80% bread flour, 20% whole wheat)
- Water: 340–360 g (68–72% hydration; start lower and raise gradually)
- Salt: 10 g
- Levain: 100 g (100% hydration)
Process outline:
- Autolyse flour + 320 g water for 45 minutes.
- Mix in levain and salt; add the remaining water during mixing to reach target hydration.
- Bulk at 24–25°C (75–77°F) with 3–4 folds across 3–4 hours.
- Pre-shape, rest 20 minutes, final shape; cold proof 12–16 hours.
- Bake at 250°C (480–500°F) with steam 20–25 minutes; finish at 235°C (455°F) for 20–25 minutes.
This base balances structure, flavor, and handling in most home ovens. Once it feels comfortable, nudge hydration, proof timing, or levain percentage to suit your environment and preferred crumb.
Kitchen workflow and gear care
Sourdough is hands-on, so a tidy workflow matters. Keep tools and surfaces clean and organized. Wipe counters before and after handling dough, wash bowls and scrapers promptly so dried dough doesn’t accumulate, and dry fabric liners fully before storing. If equipment smells strongly sour, a thorough wash and dry restores neutrality for the next bake.
Set clear zones: a mixing area, a folding spot, and a landing zone near the oven. This cuts confusion and keeps timing smooth. If you bake weekly, dedicate a tub for dough; a rectangular tub helps you judge rise and bubbles more clearly than a narrow bowl.
Plan ahead before busy days. For instance, mix in the late afternoon, shape in the evening, cold proof overnight, and bake first thing in the morning. That rhythm delivers fresh bread without rushing steps or losing sleep.
Further learning and community
Seeing many bakers solve the same puzzle is valuable. Browse method variations, flavor ideas, and kitchen-friendly tricks across trusted food sites and local baking groups. For more food and drink inspiration and practical kitchen guides, visit the Food & Beverage pages at Rod N Style.
As you keep baking, timing, temperature, and tension become familiar levers you adjust by feel. That’s the quiet charm of Homemade sourdough bread: a weekend project that turns into a satisfying household routine, one well-noted loaf at a time.