
This guide uses home coffee brewing methods as the starting point for the practical advice below. Home coffee brewing methods are easier to master than most people realize, and this guide gives you a clear, repeatable playbook for delicious cups across pour-over, immersion, espresso, moka, AeroPress, and cold brew. You’ll learn which variables matter, how to set reliable baselines, and how to make small, confident adjustments that fit your taste and gear.

Mastering home coffee brewing methods
Every brewing method is a different way of balancing the same controllable factors: dose (how much coffee), grind size (how large or small the particles), water quality (minerals and chlorine), water temperature, agitation (stirring and pouring), and contact time (how long water and coffee interact). When you measure those inputs and change only one at a time, your results quickly become consistent. The sections below show precise recipes you can adopt immediately, while also teaching you why they work so you can adapt them to your beans and preferences.
Three habits accelerate progress. First, weigh everything. A small scale that reads to 0.1 g removes guesswork and lets you compare days with confidence. Second, log your settings. A simple note—bean name, roast date, ratio, grind mark, water temperature, total time, and taste notes—turns a pile of random brews into a map. Third, clean as you go. Coffee oils and fines cling to gear and dull flavor faster than most people expect. A clean grinder, kettle, and brewer produce sweeter, clearer cups.
Use this as your baseline: for filter-style brews (pour-over and drip), start at a 1:16 ratio (1 g coffee per 16 g water) and a medium grind. For immersion brews such as French press, a little stronger—1:15—often works well. For espresso, a 1:2 ratio (e.g., 18 g in and 36 g out) is a sensible starting point. For cold brew, prepare a concentrate around 1:5 by weight and dilute to taste later. If a cup tastes sour or hollow, extraction is likely too low—grind finer, raise temperature a few degrees, or extend contact time. If a cup tastes bitter or harsh, extraction is likely too high—grind coarser, lower temperature, or reduce contact time. Controlled changes beat luck every time.
Setup and measuring fundamentals
A few reliable tools make a bigger difference than most specialty gadgets. Focus on getting a decent burr grinder, an accurate scale, and a kettle you can pour from steadily. Everything else is optional.
- Burr grinder: A burr grinder, even a compact hand grinder, produces far more consistent particles than a blade grinder. Consistency equals even extraction. Favor grinders with clear, repeatable settings so you can return to the same notch later.
- Scale with timer: A small digital scale with a 0.1 g resolution lets you measure dose and water precisely. A timer helps track brew length and shot time for espresso.
- Kettle: Any kettle works if you pour steadily, but a gooseneck kettle makes controlled pours easier. Temperature control is convenient; a simple thermometer also works.
- Filters: Keep the right paper filters on hand. Bleached filters tend to impart less paper taste than natural ones, though thorough rinsing helps either way.
- Cleaning kit: Soft brushes, fragrance-free detergent, and a towel are sufficient. Avoid scented soaps that cling to gear.
Workstation setup matters. Place the scale on a stable counter, keep your grinder within easy reach, and stage filters, spoons, and a towel before you begin. This reduces errors and heat loss from scrambling mid-brew. Create a small note or spreadsheet with columns for dose, grind, temperature, time, and score out of ten. After a week of logging, patterns emerge—you will see how each brewer responds and learn your grinder’s effective range for different beans.
If you like structured practice, try these drills once or twice. Brew the same coffee at 1:15, 1:16, and 1:17 back-to-back. Taste them in order from strongest to lightest and write a sentence about what changed—body, sweetness, acidity, aftertaste. Next, hold ratio constant and change grind in small increments. You’ll quickly develop a feel for how each variable alters the cup, which is the essence of control at home.
Beans, roast, and storage: building flavor from the start
Coffee is seasonal agriculture, not a static commodity. Origin, processing style, and roast level shape flavor before any kettle touches the beans. Washed coffees often deliver clarity and citrus-like acidity, while natural (dry) processed beans can showcase fruit and heavier body. Honey or pulped-natural methods fall between, frequently emphasizing caramel and stone fruit. Roast level amplifies or mutes those traits: lighter roasts preserve brightness and require more heat or finer grinds to taste sweet; darker roasts extract easily but can taste harsh if water is too hot or contact time too long.
Whenever possible, buy coffee with a recent roast date rather than a distant best-by stamp. Many beans taste their best between day 4 and day 21 after roast when stored correctly. If you brew espresso at home, some lighter roasts may peak at day 7–14 as CO2 settles and extraction stabilizes. Regardless of method, grind just before brewing to protect aroma; ground coffee stales rapidly, often within minutes.
Storage is simple. Keep beans in their original bag with a one-way valve or in an airtight canister, away from heat and light. A cupboard beats a countertop under bright kitchen lights. Avoid the fridge—condensation can ruin beans as you move them in and out. If you must extend life, freeze in single-brew portions (such as 18–22 g bags), seal airtight, and grind from frozen; this reduces moisture exposure. The convenience trade-off is worth it if you buy in bulk.
Water, ratios, and temperature control
Water makes up about 98 percent of filter coffee and 85–90 percent of espresso by volume, so its chemistry matters. If your tap water tastes pleasant on its own, start there. If it’s heavily chlorinated or tastes flat, filtered water helps. Very soft water can produce sour cups because it extracts acids faster than sugars, while very hard water can mute acidity and emphasize dullness. If you enjoy tinkering, consider a balanced mineral recipe designed for coffee—something that adds a touch of bicarbonate and magnesium to stabilize extraction and sweetness.
Temperature is a lever with immediate impact. For light roasts, 94–97 C (201–206 F) often helps unlock sweetness. Medium roasts typically thrive near 92–95 C (198–203 F). Dark roasts can taste better slightly cooler—88–92 C (190–198 F)—to reduce harshness. Remember that contact time and grind size interact with temperature: hotter water extracts faster, so if you raise heat, you may not need to extend brew time.
Keep a few ratios handy as defaults:
- Pour-over/drip: 1:16 (e.g., 22 g coffee to 352 g water)
- French press: 1:15 (e.g., 30 g coffee to 450 g water)
- AeroPress: 1:12 to 1:15 for hot brews; use shorter ratios for concentrated brews over ice
- Moka pot: fill the basket level with a medium-fine grind and water to just below the safety valve
- Espresso: 1:2 (e.g., 18 g in to 36 g out in roughly 25–35 seconds from first drip)
- Cold brew: 1:5 concentrate, diluted 1:1 or to taste
These are starting points, not rigid rules. If your pour-over tastes too light or hollow, move to 1:15 or raise heat a couple degrees. If your French press tastes heavy or muddy, try 1:16 with a slightly coarser grind. Small, deliberate changes make you the author of your cup rather than a passenger.
Pour-over: V60, Kalita, and Chemex
Pour-over brewing is controlled percolation: hot water passes through a bed of grounds and a filter, dissolving and carrying solubles into your cup. Your control lives in grind size, pour rate, pour placement, and water temperature, all of which influence how evenly extraction progresses. Conical drippers like the Hario V60 and Chemex promote a central flow path, while flat-bottom drippers like the Kalita Wave spread flow across the bed and can be more forgiving for beginners.
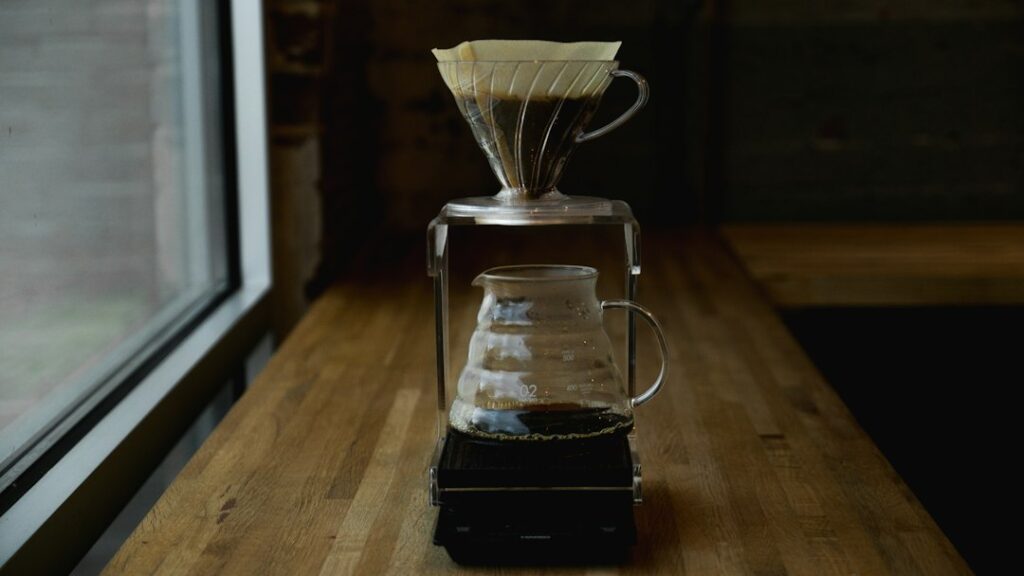
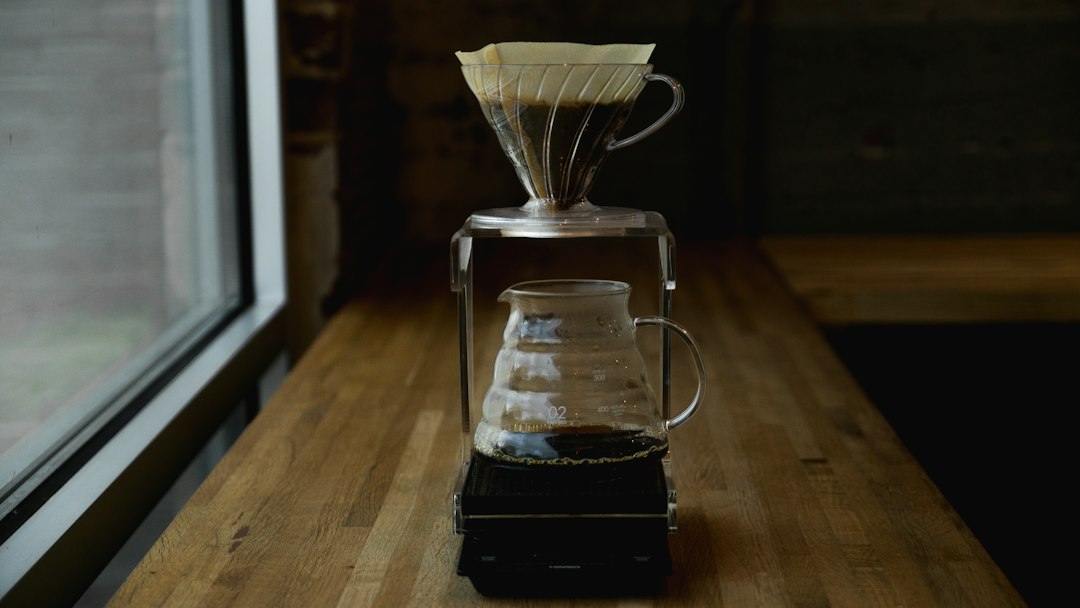
V60 02 baseline: 22 g coffee, medium-fine grind, 352 g water at 94 C, target 2:45–3:15 total time. Rinse the paper filter with hot water to remove paper taste and preheat the dripper, then discard the rinse water. Add grounds, level lightly, and start a timer. Pour a 50 g bloom, ensuring all grounds are wet, and wait 30–45 seconds. Continue with gentle circular pours, keeping the slurry just below the rim. Try three to four pulses (e.g., to 150 g, 250 g, then 352 g), letting the bed drop slightly between pours. When you reach your total water, allow it to drain fully; the last drops should fall around 3:00. Taste and adjust time and grind as needed.
Kalita Wave 185 baseline: 24 g coffee, medium grind, 384 g water at 93–94 C, total around 3:00–3:30. The flat bed reduces sensitivity to pouring technique, making it easier to achieve even extractions. Use similar pulses and aim to finish pouring by 2:30–2:45. If your drawdown stalls, your grind may be too fine or your filter folded; coarsen slightly and seat the filter carefully next time.
Chemex 6-cup baseline: 32 g coffee, medium-coarse grind, 512 g water at 94 C, total 4:00–5:00. Chemex filters are thick and can clog if you grind too fine. Rinse thoroughly, pour a 60–70 g bloom, then add water in steady, centered circles. Avoid pouring directly on the walls; keep the slurry gently moving to prevent digging channels along the sides.
Fine-tuning tips:
- Sour or underdeveloped cups: grind finer, raise water temperature, or lengthen contact time by 10–15 percent.
- Bitter or astringent cups: grind coarser, lower temperature a couple degrees, or pour slightly faster to reduce contact time.
- Uneven bed and channeling: pour more toward the center, reduce aggressive stirring, and keep your pour height consistent.
- Slow drawdown: coarsen slightly, rinse filters well, and brush your burrs to remove fines buildup.
Once your baseline is stable, experiment with gentle agitation (swirls or stir sticks) and different bloom sizes. A small swirl can level the bed and improve evenness; too much agitation can increase fines and clogging. Try a bypass pour for iced coffee: brew stronger (e.g., 1:14) with half the water and pour the rest as ice in the carafe. This “Japanese style” yields bright, aromatic iced coffee.
Immersion brewing: French press and cupping-style
Immersion brewing keeps coffee and water together for the full steep, which promotes even extraction and a forgiving workflow. The French press is the most common immersion brewer and emphasizes body and texture because the metal mesh lets some oils and fine particles through. A cupping-style approach (steeping in a bowl and skimming grounds) delivers clarity with minimal equipment and doubles as a palate training tool.
French press baseline: 30 g coffee, medium-coarse grind, 450 g water at 93–95 C. Add coffee, start a timer, pour all water, and gently stir to wet the grounds. Place the lid on to retain heat. At 4:00, skim foam and floating grounds with two spoons; this reduces residue and improves clarity. Press slowly at 4:30–5:00 and serve immediately. If you prefer cleaner cups, decant into a separate vessel and rinse the press before pouring seconds.
“No press” variation: Brew as above but skip pressing. Let grounds settle by 8–10 minutes, then pour gently through the mesh, which acts as a screen without compressing the bed. This method often yields a surprisingly clean cup with the body you expect from a press.
Cupping-style baseline: 12 g coffee to 200 g water at 93–95 C in a heatproof bowl or mug. Pour water over coffee, steep 4 minutes, break the crust with a spoon, and skim foam and floating grounds. Let sit another 2–3 minutes, then taste with a spoon. This is useful for comparing beans and roasts, and it trains your palate to notice sweetness, acidity, bitterness, and aftertaste in a neutral format.
Immersion tuning:
- Overly silty cups: grind coarser, skim more thoroughly, and pour gently to reduce turbulence when decanting.
- Flat or bitter cups: reduce steep time to 3:30–4:00 or coarsen grind slightly.
- Sour cups: extend steep to 5:30 or grind a touch finer.
Immersion brews also work well with lighter roasts that need more heat or time to unlock sweetness. If a pour-over of a light roast tastes sharp and thin, try an immersion version at 93–95 C; the extra contact time often balances the cup.
AeroPress: compact versatility
The AeroPress is a pressure-assisted immersion brewer that can mimic filter coffee, produce concentrated shots for iced drinks, and brew on the go. It’s a favorite for travel and a playground for recipe tinkering because small changes yield noticeable results. Two setups dominate: standard (filter cap on bottom) and inverted (plunger on bottom, brew, then flip to press). Paper filters yield a clean cup; metal filters increase body and aromatic oils.
Standard, filter-like cup: 15 g coffee, medium-fine grind, 225 g water at 90–94 C. Rinse the filter, preheat the chamber, add coffee, and start a timer. Pour to 225 g, stir five to ten times, cap, and press gently beginning at 1:15 to 1:45, finishing around 2:00. If pressing feels too easy, grind finer; if it’s very hard, grind coarser.
Inverted concentrate for iced drinks: 18 g coffee, fine-medium grind, 120 g water at 94 C. Stir for ten seconds, cap, flip carefully, and press over ice or water. Top to 240–300 g. This yields a sweet, syrupy base that pairs well with milk or tonic.
Competitions-style twist: Try a two-stage pour—60 g bloom for 30 seconds with a light stir, then add remaining water and steep to 1:30 before pressing. This improves evenness and reduces trapped air, which can cause spurting during the press. If your cups taste papery, rinse filters thoroughly or switch to a thicker paper; if they taste muddy, consider a paper-metal stack or a slightly coarser grind.
For repeatable results, keep headspace consistent—fill to the same line in the chamber—and avoid pressing to a squeak; the last seconds often extract harsher compounds. AeroPress changes rapidly with grind, so adjust in small increments and retaste. Make notes about how pressing speed affects texture; a slower press generally tastes cleaner.
Moka pot: stovetop concentration
Moka pots brew by steam pressure pushing water up through coffee into an upper chamber. The pressure is much lower than true espresso, but the result is a bold, concentrated cup that pairs well with milk or hot water (like an Americano). Success hinges on water level, grind size, heat control, and timely removal from the stove.
Baseline technique: Fill the bottom chamber with preheated water to just below the safety valve. Preheating shortens the time coffee sits on the stove and reduces harshness. Fill the basket level with coffee ground between drip and espresso (medium-fine). Level the top without tamping; a light shake is fine. Assemble carefully and place on medium-low heat. When coffee begins to stream into the top chamber, reduce heat. Remove from the stove once the stream goes pale and sputters; lingering heat can scorch the brew. Swirl the top chamber to mix layers and serve immediately.
Tuning tips:
- Bitter or burnt taste: start with hotter water to reduce stove time, lower the flame, and stop the brew early.
- Sour or thin taste: grind finer or ensure the basket is fully and evenly filled.
- Metallic or off taste: clean the gasket and internal surfaces, and avoid fragranced soaps that leave films.
Consider a small milk pitcher for mixing moka coffee with hot water (for a longer drink) or with steamed milk. Because moka is sensitive to heat variance, a consistent burner and attentive ear (listening for the change in sound when coffee flows) go a long way.
Espresso at home: dialing-in fundamentals
Espresso compresses the brewing process into seconds, which magnifies every variable: dose, grind, distribution, tamp, temperature stability, pressure, and yield. Home machines vary widely—manual levers, compact single-boiler machines, and heat-exchanger or dual-boiler machines all behave differently. Whatever you use, consistency in prep matters more than any single gadget.
Baseline shot: 18 g dose in a 58 mm basket (adjust to your basket if different). Grind fine enough that a 36 g yield arrives in about 25–35 seconds from first drip. Tap to settle or use a Weiss Distribution Technique (WDT) tool to break clumps and reduce channeling. Tamp level with consistent pressure; the exact force matters less than repeatability. Start the shot and watch the flow. A steady, honey-like stream that lightens (blondes) at the end is your visual cue. Stop just before heavy blonding to avoid harshness.
Dialing-in logic:
- Shot too fast and tastes sour or sharp: grind finer or increase dose slightly.
- Shot too slow and tastes bitter or hollow: grind coarser or reduce dose slightly.
- Spraying or spurting (channeling): improve distribution, ensure a level tamp, and consider a slightly coarser grind while increasing dose marginally.
- Overly dark crema and smoky taste: lower brew temperature if your machine allows, or stop the shot earlier.
Milk steaming basics: For natural sweetness, steam milk to around 55–60 C (131–140 F). Insert the steam tip just below the surface for 3–5 seconds to stretch (introduce air), then submerge to create a whirlpool and integrate microfoam. Wipe and purge the wand before and after steaming. For latte art practice, use fresh, cold milk and a pitcher sized to your drink; repeat small volumes to build muscle memory without wasting milk.
Keep notes on shot times, grind clicks, and taste. Espresso rewards small, deliberate changes. If you change beans, reset to your baseline (18 in, 36 out, 30 seconds) and adjust grind first before changing dose or yield. Always purge a small amount of water through the group before shots on single-boiler machines to stabilize temperature.
Cold brew and iced coffee
Cold brew extracts at cool or room temperatures over many hours, producing a smooth concentrate with low perceived acidity. Iced pour-over (often called Japanese iced coffee) brews hot and chills instantly over ice, preserving brightness and aroma. Both approaches suit summer mornings or afternoon refreshers and store well for a few days.
Cold brew concentrate: 200 g coffee, coarse grind, 1,000 g water (1:5). Combine in a lidded container, stir until all grounds are wet, cover, and steep 12–18 hours at room temperature or 18–24 hours in the fridge. Strain through a fine mesh sieve, then through a paper filter for clarity. Dilute 1:1 with water or to taste. Store in the fridge up to four days; flavor will gradually mellow.
Japanese iced pour-over: 20 g coffee, medium-fine grind, and a total yield of 300 g comprised of 200 g hot water and 100 g ice in the carafe. Brew as usual at around 94 C, pouring in pulses or a steady stream. The ice melts, instantly chilling the coffee and balancing dilution.
Flavor tweaks: If cold brew tastes flat or too chocolatey, choose a lighter roast or a washed Ethiopian-style coffee for more citrus and floral notes. If the concentrate tastes bitter, shorten the steep or coarsen the grind slightly. For iced lattes, an AeroPress concentrate pressed over ice and topped with milk offers a quick, repeatable base.
Troubleshooting and sensory mapping
Most cups improve quickly with a repeatable tasting routine and one-variable changes. This decision tree covers the most common issues you’ll encounter at home. Taste, jot a note, and adjust one factor; resist changing many variables at once, which makes it hard to learn what worked.
- Sour, sharp, or underdeveloped: grind finer or raise water temperature by 2–3 C; extend contact time by 10–15 percent; in espresso, increase dose or reduce yield slightly.
- Bitter, dry, or harsh: grind coarser or lower temperature by 2–3 C; shorten contact time; in espresso, reduce dose or stop the shot earlier.
- Hollow or weak: increase dose by 5–10 percent or reduce total water slightly; for espresso, lengthen yield a little if the cup lacks sweetness.
- Muddy or heavy texture: reduce agitation, coarsen grind, or switch to a paper filter in immersion brews; decant immediately to avoid oversteeping fines.
- Paper taste: thoroughly rinse paper filters and raise dose slightly if needed; bleached papers often taste cleaner.
- Metallic taste: deep-clean equipment; inspect moka gaskets or metal filters for residue or corrosion.
To sharpen your palate, build a simple flavor vocabulary. Assign a 1–5 score for sweetness, acidity, bitterness, and body for each cup. Use common references: honeyed sweetness, citrus acidity (lemon versus orange), cocoa bitterness, syrupy body. When a cup is close but not great, ask which single score needs to move and nudge the most direct variable to influence it (e.g., higher temperature for sweetness in light roasts, coarser grind to reduce bitterness). Sensory mapping like this reduces guesswork.
Consider a “triangle test” occasionally: brew three cups where two are identical and one has a small change (e.g., grind one click finer). Taste blind and try to pick the odd cup. If you reliably detect the difference, the change is perceptible; if not, your current granularity may be tighter than needed. This builds confidence in your adjustments and minimizes unnecessary tinkering.
Method comparison: strengths, constraints, and use cases
Each brewer shines in different scenarios. Understanding those strengths helps you choose the right tool for your morning and avoids fighting a method into doing something it isn’t designed for.
- V60 and conical pour-overs: Highest control, best for highlighting clarity and aromatics. More sensitive to pouring technique and grind.
- Kalita Wave and flat-bottom drippers: Forgiving and consistent, especially useful for beginners or for busy mornings when you want repeatable results.
- Chemex: Ultra-clean cups and elegant serving carafe. Requires careful grind tuning to avoid clogging; ideal for sharing.
- French press: Rich body and texture, minimal equipment. Slightly more sediment; great for robust, chocolate-forward coffees.
- AeroPress: Portable versatility. Excellent for travel and experimentation; produces both clean filter-like cups and punchy concentrates.
- Moka pot: Bold, compact drinks with a nostalgic ritual. Heat control is critical; excellent with milk or as a base for Americanos.
- Espresso: Dense flavor and compact volume; requires precise prep and a dialed-in grinder. Rewarding for milk drinks and straight shots.
- Cold brew: Low-acid perception, great for batching; long steeping requires planning and filtration for clarity.
If you need to serve several people quickly, immersion or Chemex lends itself to larger batches. If you want a single, focused cup that showcases citrus and floral notes, a conical pour-over with a light roast likely suits the moment. For weekend latte projects, invest time in espresso workflow and milk practice. Matching method to mood and context is a pleasant part of developing your at-home ritual.
Maintenance, cleaning, and sustainability
Clean gear is essential for consistent flavor. Oils oxidize and impart stale notes; fines clog screens and filters. A small daily routine keeps brews tasting fresh, and periodic deep cleans keep equipment running smoothly.
Daily:
- Brush grinder burrs and chute to remove static and fines; avoid especially oily beans if your grinder gums quickly.
- Rinse drippers, carafes, and presses with hot water immediately after brewing; let parts air-dry fully.
- Purge and wipe espresso steam wands; if your machine supports it, perform a quick backflush with water.
Weekly:
- Wash removable parts with fragrance-free detergent and rinse thoroughly.
- Soak metal filters and baskets in a mild detergent solution; rinse and dry.
- Descale kettles as needed if mineral buildup appears; follow manufacturer guidance.
Monthly or quarterly:
- Descale espresso machines as recommended; machines in hard-water regions may need more frequent cycles.
- Deep-clean grinders with a vacuum and brush; consider running grinder cleaning pellets sparingly and follow manufacturer advice.
- Inspect and replace worn gaskets on moka pots and espresso machines to prevent leaks and off-flavors.
Sustainability and waste:
- Compost spent grounds where permitted; they also make useful garden mulch when mixed with other material.
- Choose reusable filters if they match your preferred cup profile; they reduce paper use but may change texture.
- Batch brew realistically: make only what you’ll drink or store in an insulated carafe to avoid reheating, which dulls flavor.
If you want inspiration for future beverage projects, bookmark the home page at rodnstyle.com; it regularly features food and drink content that pairs well with a home coffee routine.
As your routine settles, keep returning to the basics: weigh, time, clean, and taste with intention. Structured curiosity beats equipment upgrades in most cases. The payoff is practical: a dependable morning ritual, a clearer sense of how variables interact, and cups that reflect your preferences rather than chance.